
In this guide 7 sections
Yes, if the blade manufacturer lists the new material and cutting operation, the setup is within both the blade and saw instructions, and a representative sample meets the customer's edge requirement. A change of glaze may only call for a fresh edge check. A change from a straight cut to a miter, or from ceramic tile to a sintered slab, can reopen the entire tooling decision. When the application is outside the stated range, get a suitable specification before cutting a sample.
For a tile processor, the question usually comes up when a new pallet reaches a line that is already set up. Purchasing would like to keep one blade in stock. Production would like to keep the saw running. Quality needs to know whether the edge will still be acceptable once the piece leaves the factory. The quickest way to settle that discussion is to identify what has changed and decide exactly what a trial has to prove.
Identify the tile behind the sales description
Get the manufacturer's series or product code, the declared material, the thickness and the finish. Keep the carton or pallet label with the sample. A sales name such as “marble white” describes an appearance. It could refer to marble-look glazed porcelain or to a piece of natural stone. Those descriptions lead to different tooling questions. A clear photograph of the face helps communicate the finish. A technical sheet or traceable label establishes what the supplier actually sold.
Separate the face from the body. The blade cuts through both, but the part a customer rejects may be a small break in the glaze along an otherwise straight edge. A dark body beneath a pale surface can make the same size of chip much easier to see. Ask which face will show, whether the edge goes directly into the assembly, and how much finishing is permitted. An acceptable edge on a concealed panel can be unsuitable next to a polished joint.
Record thickness, format and backing independently
A larger tile needs support appropriate to its dimensions. A thicker section changes the depth of material engaged. A backing or mesh can change what the blade encounters as it exits. These are three different changes. Record the actual thickness and dimensions alongside any backing declared by the supplier. A large-format label alone tells purchasing very little about the body or which blade reference the saw can use.
Treat published water absorption as one material identifier. It helps distinguish product families, but it does not specify a bond, grit, feed setting or acceptable finish for the job. If all you have is a picture and a description such as “hard tile,” ask for the missing series information while the production planner checks which blade references the supplier lists for that application.
Decide which changes the current blade can cover
| What has changed? | What to check | Decision before a production run |
|---|---|---|
| Another batch of the same series and thickness | Finish, backing and agreed edge standard | Keep the documented setup and verify the first representative pieces. |
| Another glaze or a marble-look design | Material declaration and visibility of the face edge | If the stated blade range covers the body, qualify the new edge against a sample. |
| A different porcelain body or a thicker section | Listed material and thickness, machine capability, cut geometry | Confirm the range first, then evaluate a representative length. |
| Straight cutting changes to mitering | Blade approval for the angle and relevant saw setup | Use a miter-rated configuration and evaluate the assembled edge. |
| Tile changes to sintered slab or natural stone | Actual material, slab fabrication guide and blade reference | Obtain a material-specific recommendation before testing. |
| Wet cutting changes to dry cutting | Explicit ratings for the blade, machine and process | Hold the change until the complete setup is approved for that mode. |
Compare the options Tap to expand
Another batch of the same series and thickness
- What to check
- Finish, backing and agreed edge standard
- Decision before a production run
- Keep the documented setup and verify the first representative pieces.
Another glaze or a marble-look design
- What to check
- Material declaration and visibility of the face edge
- Decision before a production run
- If the stated blade range covers the body, qualify the new edge against a sample.
A different porcelain body or a thicker section
- What to check
- Listed material and thickness, machine capability, cut geometry
- Decision before a production run
- Confirm the range first, then evaluate a representative length.
Straight cutting changes to mitering
- What to check
- Blade approval for the angle and relevant saw setup
- Decision before a production run
- Use a miter-rated configuration and evaluate the assembled edge.
Tile changes to sintered slab or natural stone
- What to check
- Actual material, slab fabrication guide and blade reference
- Decision before a production run
- Obtain a material-specific recommendation before testing.
Wet cutting changes to dry cutting
- What to check
- Explicit ratings for the blade, machine and process
- Decision before a production run
- Hold the change until the complete setup is approved for that mode.
A straight cut and a miter are separate applications
A blade offered for straight cuts on porcelain does not automatically cover mitering the same tile. The inclined cut leaves a fine edge and changes how the blade is loaded. Ask for approval for the operation by blade reference. As a concrete example, a blade maker lists its CPX porcelain blade for straight cutting and excludes mitering for that model. The restriction belongs to that particular design. Manufacturer’s application note.
In purchasing terms, this distinction can change the order. One reference may cover the straight strips in a project while a different approved reference is needed for exposed returns. Put the two operations on separate lines of the request. Give both blade suppliers the same drawing and indicate the edge that will remain visible after assembly. This prevents a quotation for straight cutting from becoming an unintended approval for a finished corner.
When the material changes family
For a sintered or ultracompact slab, start with the slab producer's fabrication guide and the blade supplier's approved application. Look for the exact product family, equipment and operation. A material producer may publish separate tooling and support instructions for its slabs. Apply them to the named material. When the material is natural marble or engineered stone, reopen the material selection in the same way. Example of a slab producer’s fabrication guidance.
Match the blade to the machine and the edge
Read the marking on the blade already fitted and match it to a supplier reference or drawing. Record the saw model, mounting details, permitted size and operating mode. Check the blade's marked speed limit and the machine manufacturer's requirements before installation. A larger bore adapted by an improvised arrangement, or a blade whose identity cannot be established, leaves a basic compatibility question unresolved. Ask the equipment or blade supplier for the correct approved assembly. Blade and machine compatibility guide.
A diamond blade cuts as exposed diamond grains engage the work and the surrounding bond wears to expose fresh cutting points. The desired balance depends on the material and conditions. Grit, bond and rim design act together. A fine-looking rim, its paint color or the words “soft bond” do not establish that the design will suit an unfamiliar tile. Give the supplier an application and a required edge so it can identify a reference whose suitability can be checked.
Before the first trial piece
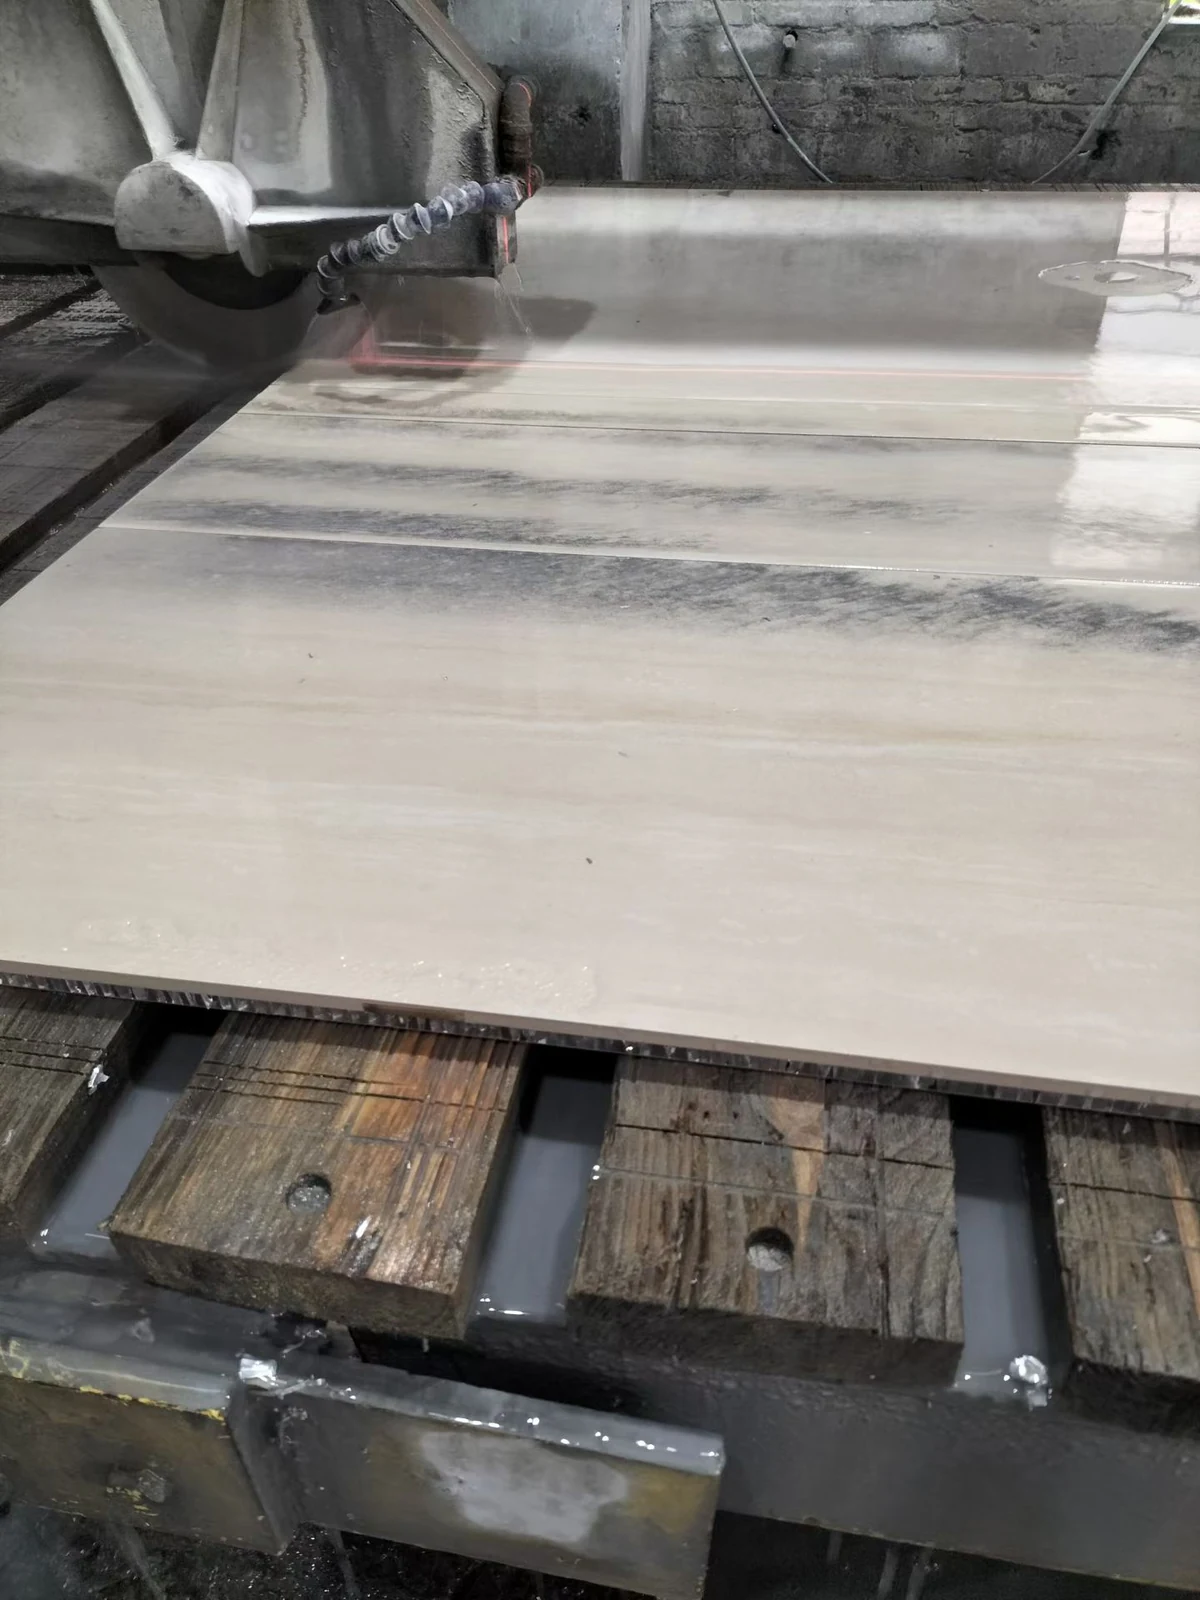
Have a trained operator check the setup under the equipment and blade instructions. Confirm that the work is supported for its full travel and that the guard, coolant delivery and mounting arrangement are suitable for the specified operation. Follow the machine's isolation procedure for physical inspections. A photo of a previous wet cut is useful context for a supplier, but it does not confirm today's coolant delivery, blade condition or support at the exit end.
Make the sample answer the production question
Use a representative offcut or spare piece from the incoming lot. Establish the finish criterion before the cut. For a visible joint, agree on a reference edge, inspection light and viewing face. For a piece that will be ground later, identify the finishing allowance. Mark which side of the trial piece will be kept. Two people can reach different conclusions about a single cut if one inspects the retained face and the other inspects the offcut.
Compare the entry, middle and exit
Start with a permitted straight sample where that matches the job, then inspect the retained edge along its length. Record any continuous glaze loss, isolated chips, deviation or corner breakout and where each appears. Photograph the face and back with the piece identified and a scale if a dimension matters. A close-up shows the feature. A second image of the entire edge tells the next shift whether it occurred once at the exit or continued throughout the cut.
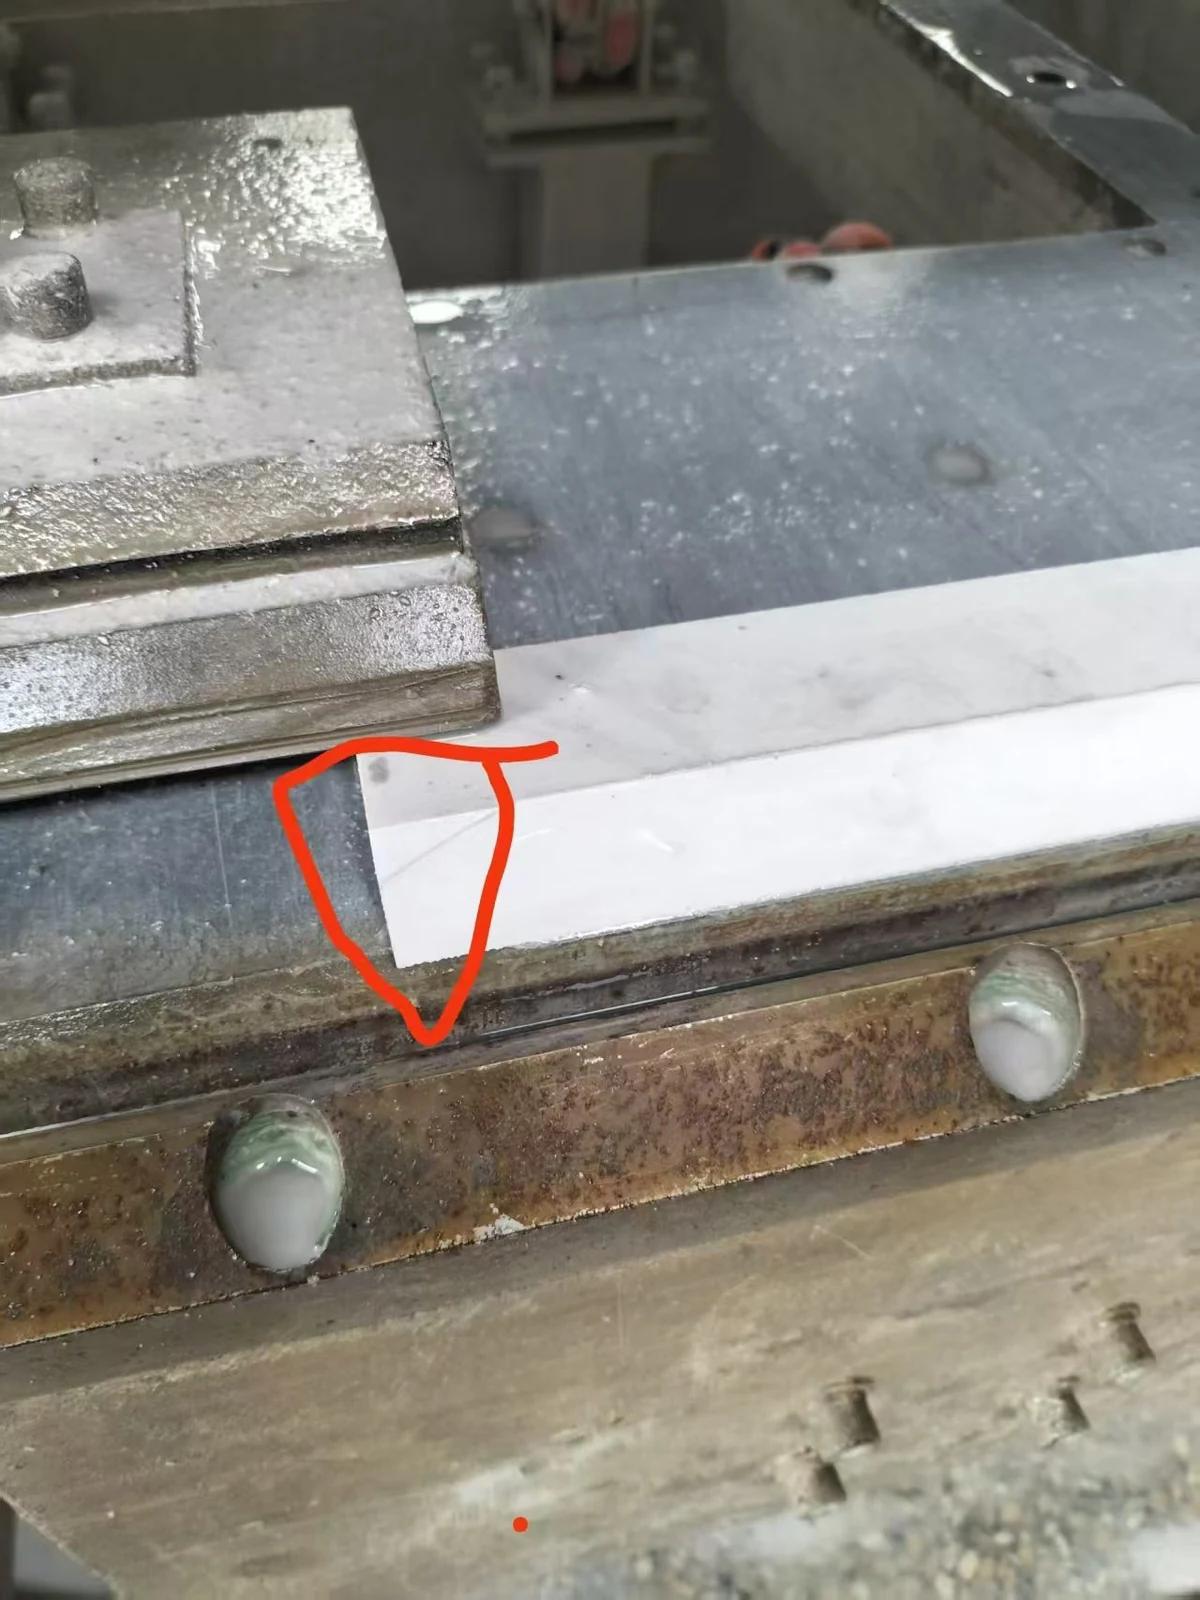
Once the first piece meets the agreed criterion, use a sample long enough to represent the order, including how the material is supported at the far end. If the issue is a mitered joint, inspect the trial assembly with its mating piece. A face edge viewed flat on the bench cannot show whether the assembled line closes evenly. A clean short cut also leaves open how the blade behaves over the full working length.
During the trial, record changes in cutting resistance, sound, edge quality and machine load where the machine reports it. An unusual noise, vibration, smoke, loss of coolant in a wet process or visible damage calls for stopping under the machine procedure. Keep hands clear and have the setup checked before resuming. Sound alone cannot identify bond hardness, and touching the rim is an unsafe way to judge temperature. Use the observed symptom to decide what needs checking.
For repeat work, keep a retained sample that the next shift can identify without the person who approved it. Mark the order or drawing reference on its back and identify the edge that was accepted. Store it so that later handling cannot chip that edge. When photographing a new sample, put it beside the reference in the same orientation and light, and keep the original images with the job record. If one photograph was taken with water on the face and the other after drying, reflections can make the comparison misleading. Agree on the same inspection condition before judging the result.
Use a changeover record the next shift can act on
| Item | What to enter |
|---|---|
| Material and tooling | Tile series, batch, thickness and finish. Blade reference and condition at the start. |
| Actual operation | Saw, permitted operating mode, straight or miter cut, support and kept edge. |
| Acceptance criterion | Customer reference, exposed face, finishing allowance and inspection method. |
| Evidence | Identified first piece, representative long edge, photographs and any rework. |
| Decision and scope | Release, hold for clarification or select another blade. State who reviewed it and what combination the decision covers. |
Compare the options Tap to expand
Material and tooling
- What to enter
- Tile series, batch, thickness and finish. Blade reference and condition at the start.
Actual operation
- What to enter
- Saw, permitted operating mode, straight or miter cut, support and kept edge.
Acceptance criterion
- What to enter
- Customer reference, exposed face, finishing allowance and inspection method.
Evidence
- What to enter
- Identified first piece, representative long edge, photographs and any rework.
Decision and scope
- What to enter
- Release, hold for clarification or select another blade. State who reviewed it and what combination the decision covers.
Consider a change from a hidden straight edge to a visible return on a tile already in stock. The material label, blade diameter and machine have stayed the same. The drawing and acceptance criterion have changed. Purchasing first needs confirmation of the miter application. Quality then needs a pair of trial pieces that can be assembled. A photo of a clean straight cut from the last order resolves neither question. Those observations tell the buyer precisely what to request from the supplier.
If the first edge passes and later pieces deteriorate, record the sequence and hold the run for review. Check for differences in the material lot, support, cooling or blade condition. A replacement blade can mask a machine or support problem for a short time. If the result still falls outside the agreed criterion, send the supplier the record and photographs with the blade reference. A pattern along the full edge is more informative than an isolated photograph labeled “bad cut.” Troubleshooting chipped tile edges.
Give a limited approval a useful name
Describe the approval in terms the storekeeper and scheduler can recognize. “Wet straight cuts on this glazed porcelain series, for edges going to grinding” identifies a narrower and much more useful stock application than “approved for porcelain.” Put the material series, drawing revision and blade reference on the changeover record. On the next order, verify those identifiers before repeating the release. If the customer wants an exposed edge instead, the earlier decision tells you exactly which question to reopen.
Frequently asked questions
Can one blade cover glazed ceramic and porcelain tile?
It can when the manufacturer lists both materials for that blade and operation. Check each tile body, thickness and required edge. A shared diameter or a successful cut on glazed ceramic gives purchasing a starting point for identification, while acceptance on porcelain requires evidence from the relevant application.
Does marble-look tile need a marble blade?
Check the material declaration. Marble-look porcelain has a decorative face and a porcelain body. Natural marble belongs to a different material family. Send the product code or technical sheet to the blade supplier if the sales name is ambiguous.
Does every thicker or larger tile require a new blade?
Check the blade's stated range and the machine's capacity for the actual thickness and operation. Larger dimensions also change support and handling. Reuse can be reasonable within a confirmed range once a representative piece has met the edge standard.
Is a wet-cut trial enough to approve dry use?
A wet trial supplies evidence for the wet setup only. Dry use requires explicit suitability of the blade and equipment for that operation and the applicable dust controls. If the project changes mode, identify an approved setup before evaluating the finish.
What should we send if the first trial chips at the exit?
Send the tile and blade references, thickness, machine and cut type. Include a full-edge view and a close-up of the retained exit corner. Describe how the piece was supported and whether the issue repeated. Those facts help the supplier distinguish several plausible causes.
Can a short successful trial prove blade life?
It can establish that the observed piece met an agreed edge criterion. A useful life comparison also needs a defined endpoint, accepted output and comparable working conditions. Keep the edge-approval decision separate from the estimate used to cost a bulk order.
Release the tile, blade and operation together
An approval that names the material, blade reference, saw, cut and acceptable edge can be reused on a repeat order. When one of those changes, start with the changed item. Check the published application, obtain a representative piece and record the result where the next shift can find it. That approach lets a plant keep useful common stock while directing new blade trials to the jobs that actually need them.